Have you ever wondered how to capture an image without a fancy camera or lens? The answer lies in the pinhole camera, one of the simplest forms of photography. It’s a great DIY project that helps you understand the basics of how cameras work while having fun at the same time!
In this guide, we’ll walk you through what a pinhole camera is, how it works, and how you can make one at home with easy-to-find materials. Let’s get started!
What is a Pinhole Camera?
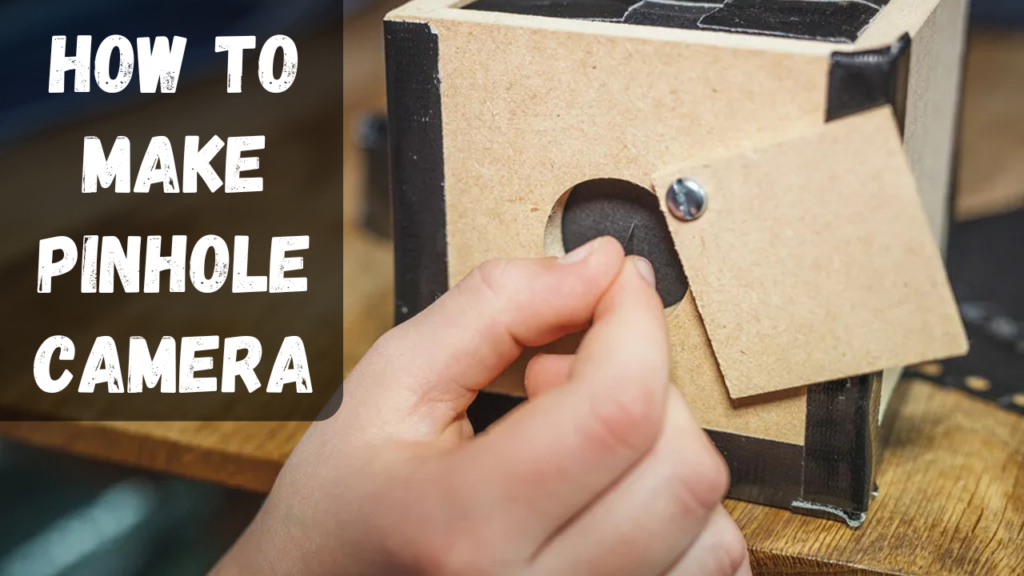
A pinhole camera is a simple camera without a lens. Instead of using a glass lens like modern cameras, it has a tiny hole (the pinhole) that allows light to pass through and create an image on a light-sensitive surface. It’s like a mini camera obscura!
How Does a Pinhole Camera Work?
The science behind a pinhole camera is simple but fascinating:
- Light travels in straight lines.
- When light from an object enters the small pinhole, it projects an inverted (upside-down) image on the opposite surface inside the camera.
- The smaller the hole, the sharper the image (but also dimmer).
- The larger the hole, the brighter the image but slightly blurry.
This basic principle is how all cameras work, even high-tech digital cameras!
READ MORE: Frustrated with Your Nest Camera
Materials You’ll Need
To make your own pinhole camera, you don’t need expensive equipment. You’ll find most of these items at home or in a local craft store:
A small cardboard box (shoe box or cereal box works well)
Thin aluminum foil (from a soda can or kitchen foil)
Black tape or paint (to block out extra light)
A needle or pin (for making the pinhole)
Wax paper or tracing paper (for viewing the image)
Scissors & glue (for assembling the camera)
A rubber band (optional, to hold things in place)
Step-by-Step Instructions to Make a Pinhole Camera
Step 1: Prepare Your Box
- Take your cardboard box and seal all the edges with black tape or paint the inside black. This prevents unwanted light from leaking in.
- Cut a small square hole (about 1 inch) on one side of the box. This is where you’ll place your pinhole.
Step 2: Make the Pinhole
- Cut a small piece of aluminum foil (about 2×2 inches).
- Use a needle or pin to gently poke a tiny hole in the center of the foil.
- Tape the foil over the hole in your box, making sure the pinhole is centered.
Step 3: Create the Screen
- On the opposite side of the box, cut out another small square.
- Tape a piece of wax paper or tracing paper over this hole. This will act as a screen where the image is projected.
Step 4: Seal the Box
- Close the box, making sure no extra light can enter except through the pinhole.
- Use more black tape if needed to block any gaps.
Step 5: Look Through Your Pinhole Camera
- Hold your pinhole camera up to a bright scene.
- Look through the wax paper screen—you should see an upside-down image!
- The image may be faint, so try using it in a well-lit area.
How to Use Your Pinhole Camera for Photography
Want to capture a real photograph with your pinhole camera? Here’s how:
Step 1: Replace the wax paper with photo paper – Instead of viewing the image directly, place a piece of light-sensitive photo paper inside the box.
Step 2: Keep the camera still – Place your camera on a stable surface.
Step 3: Expose the photo paper – Open the pinhole for a few seconds to a few minutes, depending on lighting.
Step 4: Develop the photo – Take the paper into a darkroom and develop it using photographic chemicals.
This process is how early cameras captured images before digital photography!
Tips for a Better Pinhole Camera Experience
Use a very small pinhole for sharper images.
Try different exposure times to get the best brightness and clarity.
Make multiple pinholes for fun experiments with light and shadows.
Use a tripod or stable surface to avoid shaky images.
Experiment with different box sizes to see how it affects the image size and clarity.
Fun Experiments with a Pinhole Camera
Once you’ve made your camera, try these fun activities:
Capture moving objects – Point your camera at cars, people, or clouds to see how motion affects the image.
Create art – Use long exposure times to create dreamy, artistic images.
Make a solar viewer – A pinhole camera can also be used to safely view a solar eclipse!
Build different sizes – Experiment with small and large boxes to see the difference in images.
Why is a Pinhole Camera Important?
Pinhole cameras are not just a fun DIY project—they are also an important part of the history of photography. They help us understand how light behaves and how images are formed. Even today, pinhole photography is a popular art form used by creative photographers around the world!
Conclusion
Making a pinhole camera is an exciting and educational experience. It’s a simple way to understand the basics of photography and light while having fun with hands-on creativity. Whether you’re doing this as a school project or just for fun, you’ll love the magic of seeing an image appear through a tiny hole.
So, grab your materials and start making your own pinhole camera today! Happy experimenting!


